 Whatsapp:
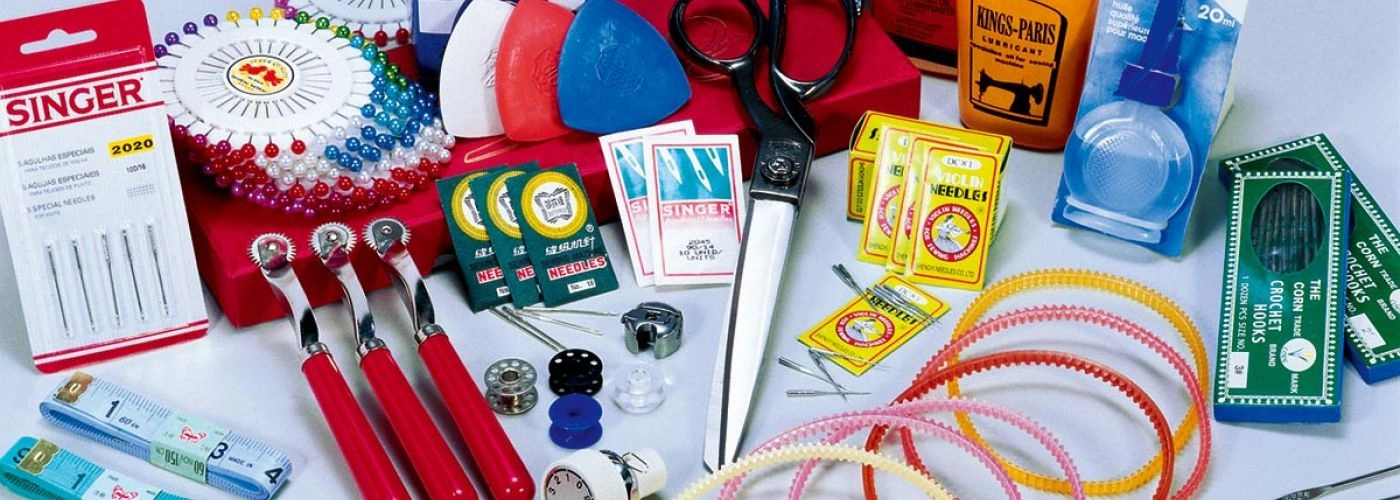
Basic Sewing Instruments for Beginners
Starting your sewing journey is exciting — but before you stitch your first seam, you’ll need the right sewing tools. A sewing kit—a curated collection of essential tools like scissors, rotary cutters, rulers, stabilizers, and reference books—is a great way for beginners to ensure they have everything needed to get started. Whether you’re hand sewing or using a machine, having a well-prepared toolkit will make every project easier, faster, and more enjoyable, adding more fun to the creative process.
This guide introduces the most essential sewing instruments every beginner should have, along with practical tips for using them effectively.
1. Measuring Tools

Accuracy is the foundation of good sewing. A flexible measuring tape, seam gauge, and ruler are must-have sewing utensils for cutting and adjusting fabric.
Always measure twice before you cut — precision ensures your pieces are the correct size, align perfectly, and saves you from costly mistakes.
2. Cutting Tools

A pair of sharp fabric scissors is one of the most essential seamstress tools. Fabric scissors are designed to cut fabric easily and should not be used for paper or other materials, as this can dull the blades and reduce their effectiveness.
You may also want to invest in:
-
Thread snips: for trimming loose ends neatly.
-
Rotary cutter: for smooth, clean cuts on long straight edges. Rotary cutters are excellent for cutting fabric, leather, and even thicker fabrics. They can create straight lines, various shapes, and precise corners, especially when used in combination with a quilting ruler. This makes them ideal for quilting and crafting projects.
-
Paper scissors: for cutting paper patterns only, ensuring your fabric scissors stay sharp for fabric use.
-
Pinking shears: for finishing fabric edges and creating decorative zigzag edges that help prevent fraying.
When choosing cutting tools, always consider the right tool for the job. The material and weight of your fabric will influence your choice—some tools are better suited for thicker fabrics or heavy materials like leather. Using a cutting mat is also important to protect your work surface when you cut fabric.
3. Marking Tools
Before you start sewing, you often need to mark your fabric for seams, darts, or button placements.
Common tools for sewing that help with marking include:
-
tailors chalk
-
Water-soluble pens
-
Tracing wheels and carbon paper
These allow you to transfer patterns or placement lines without damaging the fabric surface. Marking tools are also used to trace pattern pieces onto fabric, ensuring accurate cutting. It's important to mark seam allowances clearly to achieve precise sewing results.

4. Pinning and Holding Tools
Pins and clips might seem simple, but they’re vital for precise sewing. They keep fabric layers in place, especially during tricky curves or thick seams.
Recommended sewing instruments for this step:
-
Straight pins or safety pins — Pins come with different heads, such as plastic, metal, or silk. Silk pins are ideal for delicate fabrics like silk, as they do not bend easily and prevent fabric damage. Metal pins offer durability and precision, while plastic head pins are more affordable but can melt under heat.
-
Fabric clips
-
Magnetic pin cushion — a handy tool that keeps your workspace tidy and safe. Using a pin cushion or container also makes it easy to carry pins and clips between workspaces.
A sharp point on your pins is essential for precise pinning and accurate fabric placement.

5. Needles and Thread
Selecting the right needle for your fabric and project is essential for successful sewing and durability. Stock up on a variety of hand-sewing needles and machine needles, as different fabrics and techniques require different sizes and types, such as when working with embroidery.
When choosing your sewing thread, be sure to match the thread color to your fabric for a polished, seamless look. For example, use a hand-sewing needle to hem a party dress for a professional finish. If your project involves decorative stitching, consider using embroidery thread and specialized embroidery needles for enhanced creative versatility. Pair your needles with high-quality sewing thread that matches your fabric type — cotton, polyester, or nylon — to ensure durability and a neat finish.

6. Sewing Machine Essentials
If you’re sewing by machine, you’ll also need a few maintenance sewing tools:
-
Extra bobbins and needles (be sure to check your machine manual to ensure you use the correct size bobbins for your model)
-
Small screwdriver and oil for cleaning
-
Seam ripper, an indispensable helper — even professionals use it to fix mistakes gracefully!
It's a good idea to test your sewing machine with different fabrics to make sure it performs well for your projects. For added convenience, you can purchase pre-assembled sewing machine kits or accessories from a trusted retailer to streamline the process of gathering your essential supplies.
7. Pressing Tools
Ironing isn’t just for finishing — it’s part of the sewing process. Proper pressing gives garments shape and a professional look, and using the right technique or tool can make a noticeable difference in the final appearance of your project.
Essential sewing utensils for pressing include:
-
Steam iron
-
Ironing board
-
Pressing cloth to protect delicate material and fabrics.
8. Organization and Storage

Keeping your sewing tools organized is key to a smooth and enjoyable sewing experience. Designating a specific spot for each sewing tool—whether it’s a classic sewing box, a modern sewing cabinet, or a handy drawer—ensures that your supplies are always within reach when inspiration strikes. For small items like pins, needles, and threads, using pattern weights or a few different types of small containers can help prevent clutter and make it easy to find what you need.
Consider investing in specialized storage solutions, such as a rotary cutter case or a scissors holder, to keep your most-used tools safe and accessible. Labeling containers or using a dedicated sewing tool organizer can save you time and frustration by making it simple to locate the right tool for each step of your project. With an organized workspace, you’ll spend less time searching for supplies and more time creating beautiful projects with confidence.
9. Safety Precautions
Safety should always come first when working with sewing tools. Many essential tools—like scissors, rotary cutters, and needles—are sharp and require careful handling. Always use a cutting mat when working with a rotary blade to protect both your work surface and your hands. Make sure to engage the safety guard on rotary cutters when not in use, and keep all sharp tools out of reach of children and pets.
When using your sewing machine, follow the manufacturer’s instructions and take regular breaks to avoid fatigue. Handle your seam ripper with care to prevent accidental cuts or punctures, and always cut away from your body. For pressing, use a tailor’s clapper or a pressing cloth to protect your hands from burns, and keep a fire extinguisher nearby as a precaution. Regularly inspect your sewing tools and machines for signs of wear or damage—replacing dull blades or bent needles promptly will help prevent accidents and keep your sewing process running smoothly. By staying mindful and taking these simple precautions, you can enjoy a safe and rewarding sewing experience every time you sit down to sew.
Final Thoughts
Building your collection of tools for sewing doesn’t have to be overwhelming or expensive. Start with the basics, learn how to use each sewing instrument, and expand your toolkit as your skills grow.
If you are interested in learning more, consider exploring additional tools or resources that can help you enhance your sewing experience.
With these essential seamstress tools and sewing utensils by your side, you’ll be ready to create your own sewing projects with confidence and creativity.
