 Whatsapp:
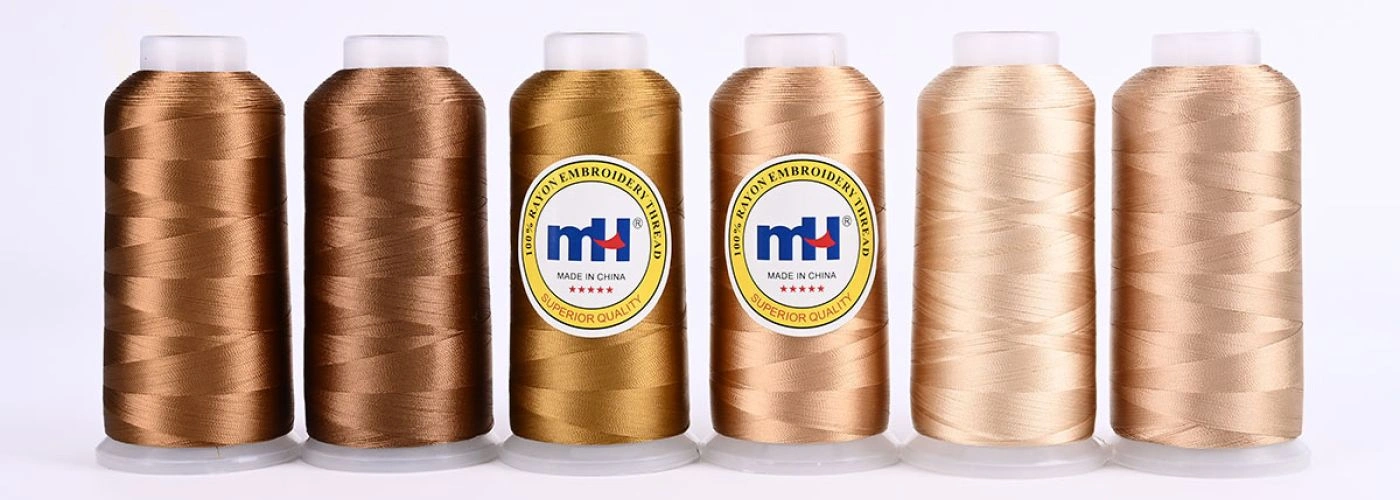
Embroidery With Thread: A Beginner’s Guide
Embroidery has always been an art of patience and creativity, where the smallest details can make the biggest difference. For beginners, one of the most common questions is whether ordinary sewing thread can be used instead of embroidery floss. This guide explores the differences, practical tips, and techniques for embroidery with thread, especially when using sewing thread.
Experimenting with different fibers and materials can add a fun and creative dimension to your embroidery projects, allowing you to play with texture and variety.
Embroidery is not only a decorative art but also a celebration of traditional hand work, often involving a wide range of fibers beyond standard threads. The choice of fiber—such as cotton, silk, wool, Matt Rayon Embroidery Thread, or even metallic threads—can influence the texture, appearance, and technique of your hand work.
When learning the basics of embroidery, it's important to understand how different fiber types can affect the look and feel of your hand work, making each project unique.
Introduction to Embroidery
Embroidery is a timeless and creative form of decorative art that transforms simple fabric into something truly special. At its core, embroidery involves using a needle and thread to stitch patterns and designs onto fabric, allowing you to express your creativity in endless ways. Whether you’re interested in embellishing clothing, personalizing home decor, or simply exploring a new hobby, hand embroidery offers a world of possibilities for beginners.
Getting started with embroidery is easier than you might think. With a variety of embroidery threads, needles, and basic techniques at your disposal, you can quickly learn how to thread your needle, make your first stitches, and create beautiful patterns. The process of threading, stitching, and securing your thread to the fabric is fundamental, and mastering these basics will set you up for success. As you explore different embroidery techniques, you’ll discover how each stitch and thread choice can bring your designs to life. Embroidery is a rewarding craft that welcomes beginners and encourages creativity at every step.
1. Can I Use Regular Thread for Embroidery?
The short answer is yes, you can. Regular sewing thread is thinner than traditional embroidery floss, but it can still be used to create delicate and neat embroidery. The key is to understand how sewing thread behaves compared to embroidery floss:
-
Thickness: Embroidery floss, also known as six stranded cotton or stranded cotton, usually comes with six strands that can be separated, while sewing thread and cotton thread are typically a single fine strand. Both embroidery floss and cotton thread come in different thicknesses and can be separated into two strands or more for different effects. Some threads, like perle cotton, are available in four sizes, giving embroiderers more options for different effects.
-
Shine: Embroidery floss is often mercerized for sheen, giving the finished work a more vibrant look. Sewing threads often have a matte finish compared to the sheen of embroidery floss.
-
Durability: Sewing thread is designed for strength, which means your embroidery will be less likely to fray over time.
Sewing threads are versatile and can be used for both hand and machine embroidery.
If you want a more subtle, minimalist effect, sewing thread can actually be a great choice. When using sewing thread, it can be threaded through the needle in two strands for more coverage.
Embroidery Needles and Tools

Before you start stitching, it’s important to gather the right tools for your embroidery project. The most essential item is the embroidery needle. Embroidery needles come in a range of types and sizes, each suited for different threads and techniques. For example, tapestry needles have a blunt tip and are ideal for working with thicker threads or wool, while sharp needles are perfect for finer threads and more delicate fabrics. Choosing the right size needle is also key—larger needles work best with thicker threads, while smaller needles are suited for fine threads and detailed work.
In addition to embroidery needles, make sure you have a good pair of sharp scissors for trimming threads, a hoop or frame to keep your fabric taut, and a needle threader to help with threading finer threads. Some embroiderers also find tweezers helpful for managing threads and removing small knots. Investing in high-quality tools will make your stitching smoother and more enjoyable, allowing you to focus on perfecting your embroidery techniques and creating beautiful designs.
Thread Weights and Strands
One of the most exciting aspects of embroidery is experimenting with different threads to achieve a variety of effects. Embroidery threads come in various weights and numbers of strands, each offering unique possibilities for your hand embroidery projects. The most popular choice for beginners is cotton embroidery floss, which is made up of 6 strands that can be separated. This divisible thread allows you to use anywhere from a single strand for fine details to all 6 strands for bold, fully covered lines.
Other threads, such as perle cotton and silk threads, are non-divisible and come in different weights, from fine to thick. Perle cotton, for example, has a beautiful sheen and is available in various weights for different textures, while silk threads add a luxurious, soft finish to your work. Tapestry wool is a thicker thread that creates a rich, dimensional effect, perfect for certain stitches and textured patterns. By understanding the different types of threads, weights and strands of embroidery threads, you can choose the right thread for each technique—whether you want a delicate line with 2 strands of cotton embroidery floss or a bold, textured look with tapestry wool. Experimenting with different threads will help you discover your favorite combinations and bring your embroidery patterns to life.
Preparing for Embroidery
Proper preparation is the foundation of successful hand embroidery. Before you start stitching, take a moment to set up your materials. Begin by stretching your fabric in an embroidery hoop or frame to keep it taut and make stitching easier. Choose a fabric that suits your project—cotton and linen are popular choices for their smooth weave and durability.
Next, thread your needle with your chosen embroidery thread. Depending on the effect you want, you might use a single strand for fine details or multiple strands for a thicker line. To secure your thread, you can use a small knot at the end or try the waste knot method, which involves anchoring your thread with a few stitches before trimming the knot away. Anchoring stitches are another way to start your thread securely without a visible knot. Paying attention to the tension of your stitches and the type of needle you use will help you achieve even, smooth results. By preparing your fabric, thread, and needle carefully, you’ll set yourself up for a satisfying and creative embroidery experience.
2. How to Embroider with Sewing Thread
When you decide to try embroidering with sewing thread, here are some practical steps to follow:
-
Double the Thread
Since sewing thread is thin, you can use two or three strands together to achieve more coverage. This is a common method in hand stitching to add strength and visibility. -
Choose the Right Needle
Select an embroidery needle with a small eye, suitable for fine thread. This prevents tangling and slipping. -
Work with Shorter Lengths
Regular sewing thread tends to tangle more easily. Cut lengths of 30–40 cm instead of longer strands. Managing the working thread carefully helps avoid knots and prevents a long tail from getting in the way. -
Secure the Thread
To start, use different methods such as knotting, making a loop, or other methods like the waste knot to anchor your thread securely. At the starting point, you can use a teeny tiny stitch to anchor the thread neatly and invisibly. -
Experiment with Stitches
Sewing thread works best for backstitch, running stitch, and stem stitch. For filling stitches like satin stitch, you may need multiple layers. When stitching, gently pull the thread to keep your stitches neat and even. -
Combine Materials
You don’t have to choose only one type of thread. Mixing embroidery floss and sewing thread can create texture contrast. -
Finishing
When you finish, wrap the thread around the needle or fabric to secure it, and trim the tail for a tidy result.
Refer to this post for more embroidery methods, tips, and techniques to improve your hand stitching projects.
Basic Embroidery Stitches
Learning a few basic embroidery stitches is the perfect way to start your hand embroidery journey. These foundational stitches form the basis for countless patterns and designs. The running stitch is one of the simplest techniques, where you weave the needle in and out of the fabric to create a dashed line—ideal for outlines and borders. The backstitch creates a solid, continuous line and is commonly used for outlining shapes and adding definition to your embroidery.
Another essential stitch is the satin stitch, which fills in shapes with smooth, closely spaced lines of thread, giving your designs a polished, fully covered look. Each stitch has its own unique effect, and by practicing these basic embroidery stitches, you’ll gain confidence and control over your needle and threads. As you become more comfortable, you can experiment with different threads, needles, and techniques to create a variety of textures and patterns. With a little practice, you’ll be able to stitch beautiful, intricate designs and bring your embroidery ideas to life.
3. Advantages of Using Sewing Thread in Embroidery
While embroidery floss is the traditional choice, sewing thread has its own advantages:
-
Cost-effective: If you already have spools of thread at home, you don’t need to invest in new materials.
-
Subtle Finish: Ideal for monogramming or delicate outlines on fabrics like linen or cotton.
-
Availability: Sewing thread comes in a wide range of colors and is easy to find.
-
Durability: Stronger than floss, making it suitable for projects that will be washed frequently.
Projects stitched with sewing thread often have a delicate and refined appearance, especially when creating detailed monograms or floral designs.
4. Limitations You Should Consider
Of course, there are also limitations to embroidery with sewing thread:
-
Color Depth: Sewing thread colors may not appear as rich as embroidery floss.
-
Time-Consuming: Because it is finer, filling a larger area takes longer.
-
Texture Variety: Embroidery floss allows layering and blending more easily.
That said, these limitations can be turned into creative effects if you’re aiming for a minimalist, modern embroidery style.
5. Who Is the Audience for Sewing Thread Embroidery?
The idea of using sewing thread for embroidery appeals to a wide range of people:
-
Beginners: Those who want to try embroidery without buying special materials.
-
DIY Enthusiasts: Hobbyists who like experimenting with everyday items.
-
Sewing Lovers: People who already own spools of sewing thread and want to expand their craft.
-
Minimalist Artists: Creators looking for fine, delicate lines rather than bold textured stitches.
-
Students and Crafters on a Budget: Perfect for low-cost projects.
6. Practical Tips for Beginners
-
Always test on a scrap fabric first to see how sewing thread looks.
-
Use contrasting thread colors to make patterns stand out.
-
Keep a thread conditioner or wax handy to reduce tangling.
-
Don’t be afraid to mix materials—you can outline with sewing thread and fill with embroidery floss.
Conclusion
Embroidery is about creativity, not strict rules. While embroidery floss is the traditional choice, regular sewing thread can also be used effectively—especially for beginners, minimalists, or anyone experimenting with what they already have. By learning how to embroider with sewing thread, you open up new possibilities for subtle, delicate, and budget-friendly embroidery projects.
So next time you wonder, “Can I use regular thread for embroidery?”, the answer is yes—give it a try and let your creativity decide the outcome. We hope you find this information helpful and feel encouraged to try embroidery with sewing thread.
