 Whatsapp:
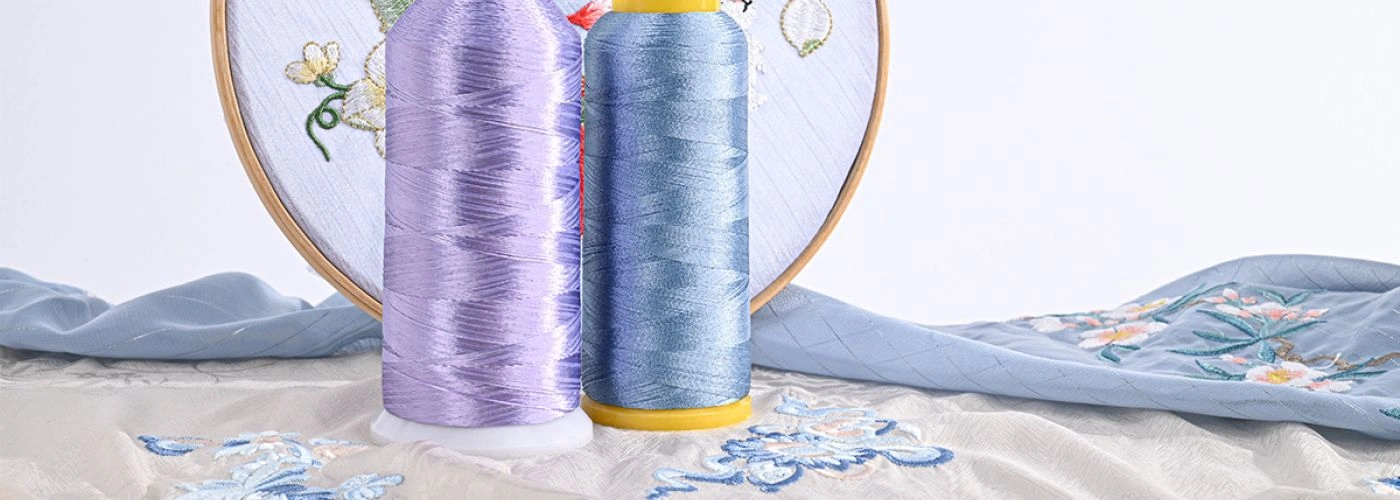
How to Use Embroidery Thread Like a Pro: Complete Guide
Embroidery transforms ordinary fabric into works of art through careful stitching and thoughtful thread selection. This ancient craft continues to captivate modern artisans, from casual hobbyists creating personalized gifts to professional textile designers crafting intricate patterns. If you’re new to the craft, this article serves as a beginner's guide to using embroidery thread, providing essential knowledge for those just starting out. Success in embroidery depends largely on understanding how to use embroidery thread correctly.
Mastering thread handling techniques ensures neat, durable stitches that maintain their beauty over time. Proper thread preparation, needle selection, and stitching methods form the foundation of quality embroidery work. Whether you’re beginning your first project or refining advanced techniques, understanding these fundamentals will elevate your craftsmanship. We hope this guide helps you feel confident and inspired to try embroidery for yourself.
Introduction to Embroidery
Embroidery is a timeless craft that brings fabric to life with colorful designs and personal touches. At its heart, embroidery involves using a needle and embroidery floss to stitch patterns onto fabric, transforming simple materials into unique works of art. Whether you’re drawn to classic cross stitch or more freeform styles, embroidery offers endless creative possibilities for projects big and small.
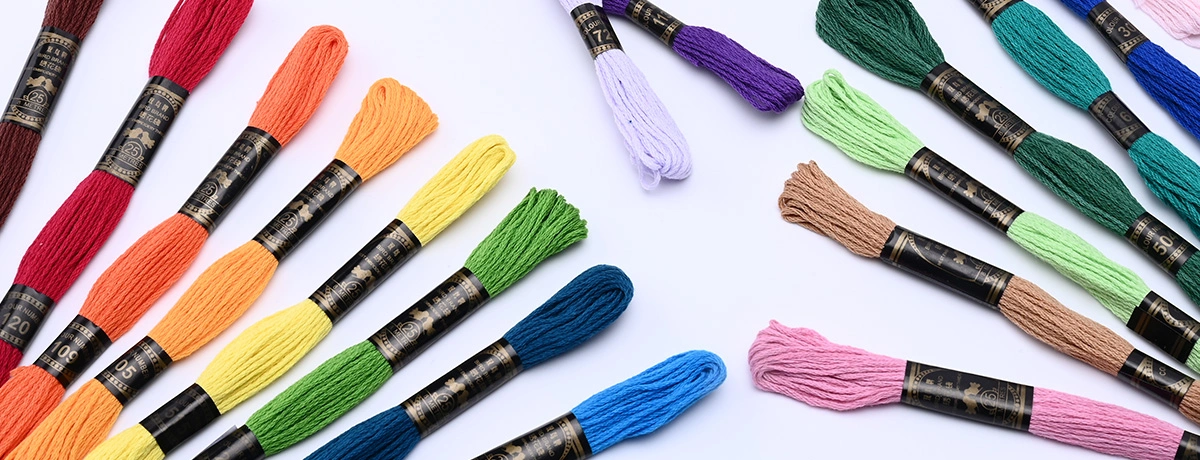
A key material in embroidery is embroidery floss, also known as stranded cotton. This versatile thread is made up of six strands of soft cotton thread twisted together in a skein. You can use all six strands for bold, eye-catching stitches, or separate them to use fewer strands for finer details and delicate textures. This flexibility allows you to customize the thickness and look of your stitches, making embroidery floss perfect for everything from simple cross stitch patterns to intricate, layered designs.
Understanding how to work with embroidery floss—how to separate the strands, thread your needle, and choose the right number of strands for your project—is essential for successful stitching. With just a needle, some floss, and your chosen fabric, you can start creating beautiful embroidery projects that reflect your personal style.
Understanding Embroidery Threads and Floss
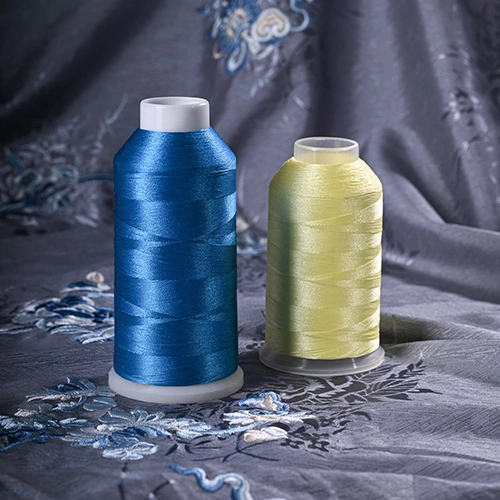
Different thread types serve specific purposes in embroidery projects. Embroidery floss, the most common type, consists of six loosely twisted strands that can be separated for varying thickness levels. When selecting embroidery floss, choosing a reputable brand, such as DMC, ensures consistent quality, colorfastness, and reliable results. Pearl cotton thread features a smooth, lustrous finish with twisted construction that creates bold, defined stitches and is a non divisible thread, used directly off the skein or ball. Metallic threads add shimmer and dimension but require careful handling due to their delicate nature. There are also other threads and specialty options, each with unique properties and suitable applications for both hand and machine embroidery.
The six-strand construction of embroidery floss offers remarkable versatility. Beginners often use all six strands for bold coverage, while experienced embroiderers separate individual strands for delicate detailing. This flexibility allows one thread type to serve multiple design purposes within a single project, depending on the pattern complexity and requirements.
Thread weight and fiber content significantly impact the final appearance. Cotton threads provide durability and consistent color retention, while silk threads offer luxurious sheen but require more careful handling. Understanding these characteristics helps you select appropriate threads for specific applications and ensures the best results when embroidering with different materials.
Choosing the Right Thread
Selecting the perfect thread is a crucial step in any embroidery project. With so many options available, it’s important to understand the different types of embroidery threads and how they can affect your finished piece. Embroidery floss is the most popular choice for both beginners and experienced stitchers, thanks to its wide range of colors and versatility. This stranded embroidery floss is ideal for cross stitch, hand embroidery, and even some machine embroidery techniques, allowing you to adjust the thickness by using more or fewer strands.
For projects that require a touch of luxury or a different texture, silk threads offer a beautiful sheen and a soft, smooth finish, making them perfect for intricate and delicate designs. Rayon thread is another popular option, especially for machine embroidery, as it provides a vibrant, glossy look and works well for creating bold, decorative stitches. Cotton thread remains a staple for its durability and matte finish, making it suitable for a variety of embroidery techniques and everyday projects.
When choosing your thread, consider the technique you’ll be using—cross stitch, hand embroidery, or machine embroidery—as well as the look and feel you want to achieve. Beginners may find it helpful to start with stranded embroidery floss or cotton thread, as these are easy to work with and widely available. As you gain experience, experimenting with silk threads, rayon thread, and other specialty threads can help you create unique effects and elevate your embroidery projects.
Preparing Your Embroidery Thread
Proper thread preparation prevents frustrating tangles and ensures smooth stitching. Embroidery floss is typically sold in skeins, and proper handling starts with unwinding skeins carefully. Cut thread lengths between 18 and 24 inches for optimal handling. Longer threads increase tangling risks, while shorter threads require frequent rethreading, disrupting your rhythm.
When using embroidery floss, separating strands is essential for achieving the desired stitch thickness. Identify one end and the other end of the floss to make separating strands easier—test each end to see which pulls apart more smoothly. Gently grab the correct number of strands for your project and pull them apart slowly to avoid tangling. For fine details, use a single strand, while two strands are ideal for medium coverage. Decide how many strands to use based on the effect you want, and after separating, combine the strands as needed.
To secure your thread at the start of stitching, try the thread loop method for a neat, knot-free start. This technique is especially effective when using two strands folded in half, providing a secure and tidy back.
Thread organization saves time and maintains color consistency throughout your project. Wrap floss around paper or plastic bobbins and store them in a box to keep skeins organized and tangle-free. Use labels or write on paper bobbins to identify each color, making it easy to find the right shade for complex multi-color designs.
Threading the Needle Correctly
Needle selection directly impacts thread performance and stitching ease. Embroidery needles feature larger eyes to accommodate multiple thread strands, while their sharp points penetrate fabric cleanly. Choose needle sizes that allow thread to pass through comfortably without forcing or stretching the eye.
Insert the thread through the needle eye with a confident, swift motion. Gently push the thread through the eye, taking care not to fray or damage the thread. Wet the thread tip slightly or use a needle threader for stubborn threads. Leave a tail approximately four inches long to prevent the thread from pulling through during stitching.
Secure your thread with a small knot at the end by tying a knot, or use the waste knot technique for projects where knots might show through lightweight fabrics. Alternatively, you can use the loop method, which involves folding the thread to create a loop and anchoring the first stitch with it for a tidy start. The waste knot method involves making a knot several inches from your starting point, then cutting it away after establishing anchor stitches.
Basic Stitches with Embroidery Thread

Foundation stitches form the building blocks of embroidery design. The running stitch creates simple lines and outlines by passing the needle over and under the fabric in regular intervals. Backstitch produces solid, continuous lines perfect for lettering and precise outlines. When starting, secure the thread by weaving the loose end under the back of several stitches before trimming to prevent unraveling. Avoid the mistake of not securing your thread properly, as this can cause your stitching to come undone and require rework. Both stitches work well with single or multiple thread strands depending on desired line weight.
Satin stitch fills areas with smooth, parallel threads that create solid color blocks. This technique requires consistent thread tension and careful spacing to achieve even coverage. French knots add texture and dimensional elements, perfect for flower centers or decorative accents.
Each stitch type responds differently to thread thickness and fabric choice. Practice these fundamental techniques on sample fabric before beginning final projects. This preparation helps you understand how your chosen thread behaves with specific stitches and fabric combinations.
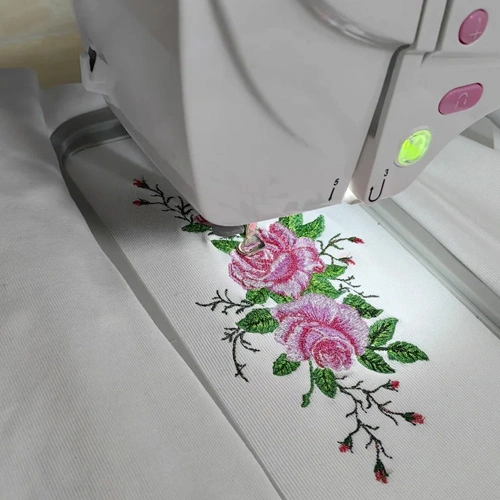
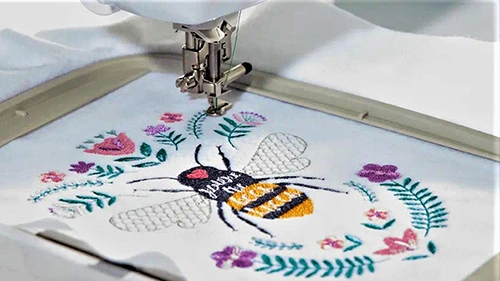
Machine Embroidery Essentials
Machine embroidery opens up a world of possibilities for creating detailed and professional-looking designs on fabric. To achieve the best results, it’s important to choose the right embroidery thread for your machine embroidery projects. Polyester thread is a top choice for its strength, colorfastness, and ability to withstand repeated washing, making it ideal for clothing and home décor. Rayon thread is also popular for machine embroidery, offering a brilliant sheen and smooth finish that brings designs to life with vibrant color.
Metallic threads can add sparkle and dimension to your machine embroidery, but they require careful handling and the right machine settings to prevent breakage. No matter which thread you choose, always use high-quality embroidery thread designed specifically for machine embroidery to ensure smooth stitching and reduce the risk of thread breaks.
In addition to thread selection, using the correct stabilizer and adjusting your machine’s tension settings are key to successful machine embroidery. A good stabilizer supports the fabric and prevents puckering, while proper tension ensures even stitches and minimizes thread issues. Beginners should start with simple designs and gradually experiment with different threads and settings to find what works best for their projects. With the right combination of embroidery thread, stabilizer, and machine settings, you’ll be able to create beautiful, durable embroidery that stands out on any fabric.
Tips for Neat and Long-Lasting Embroidery
Consistent thread tension prevents puckering and maintains even stitch appearance. Avoid pulling threads too tightly, which can distort fabric and create visible gathering. Gentle, steady tension creates professional-looking results that maintain their shape over time.
Proper lighting and fabric support improve stitch accuracy and reduce eye strain. Use an embroidery hoop to maintain consistent fabric tension, repositioning it as needed to access different design areas. Choose hoops slightly larger than your immediate work area to minimize repositioning frequency.
Thread storage affects both color retention and working properties. Store threads away from direct sunlight to prevent fading, and keep them organized to prevent tangling. Quality storage systems protect your investment and ensure consistent results across multiple projects.
Common Mistakes to Avoid When Using Embroidery Floss
Excessive thread length ranks among the most common embroidery mistakes. Long threads tangle easily and may wear thin from repeated pulling through fabric. Maintain working lengths between 18-24 inches for optimal results.
Another frequent mistake is not considering how threads will react when washed. Some threads, such as matte or metallic varieties, may lose color or luster, or become damaged if not cared for properly. Always check thread care instructions and plan for how your finished piece will be washed to avoid unwanted changes.
Fabric selection significantly impacts embroidery success. Dense, tightly woven fabrics may resist needle penetration and cause thread breakage, while very loose weaves may not provide adequate support for detailed stitches. Test your thread and stitch combination on fabric scraps before beginning your main project.
Rushing through thread preparation often leads to uneven results. Take time to properly separate floss strands and ensure consistent thread lengths. This preparation phase directly impacts the quality and appearance of your finished embroidery.
Professional Results with Quality Materials
Thread quality affects both the stitching process and final appearance. Consistent fiber quality ensures even dye penetration and uniform thread thickness, resulting in professional-looking embroidery. MH has created a range of resources and products for embroidery professionals, providing high-quality embroidery threads engineered for reliable performance across diverse applications.
Color selection plays a crucial role in design impact. MH offers an extensive color palette to support creative vision while maintaining color consistency within each dye lot. This reliability proves essential for large projects requiring multiple thread purchases.
Professional embroiderers and hobbyists alike depend on consistent thread performance. MH threads undergo rigorous quality control processes to ensure reliable results, whether you’re creating single pieces or managing large-scale production requirements. For more information, supplies, and additional embroidery tips, visit the MH website. You can also find helpful post content and browse more posts with tutorials and guides to enhance your embroidery skills.
Advancing Your Embroidery Skills
Understanding how to use embroidery thread properly opens doors to increasingly complex techniques and design possibilities. Master these fundamental principles to build confidence for advanced applications including dimensional embroidery, mixed-media projects, and commercial applications.
Quality threads support skill development by providing consistent, predictable performance as you explore new techniques. Investing in reliable materials allows you to focus on developing your artistic abilities rather than compensating for material inconsistencies.
For businesses requiring consistent thread supplies, wholesale purchasing ensures project continuity while managing costs effectively. Contact MH for bulk order inquiries to support your embroidery operations with reliable, high-quality materials that meet professional standards.
We would love to hear about your embroidery journey or any tips you have—please share your experiences or feedback in the comments below. Happy stitching!
